
The math of calorie density
Backpacking is amazing, but it presents a unique nutritional puzzle. You’re asking your body to do a lot of work – often at altitude, carrying a substantial load – and that requires serious fuel. The problem? Every ounce counts. We're aiming for a target of 3000+ calories packed into under 2 pounds of food for multi-day hikes, and that’s a surprisingly difficult feat.
It's not just about willpower or finding "healthy’ snacks. The biggest challenge is calorie density. Fresh food, while nutritious, is mostly water. That water adds weight without adding energy. Bulky snacks like granola bars might seem convenient, but they often don"t deliver enough calories for their size. This means we need to be strategic.
This article isn't about finding the easiest options. It's about maximizing calories per ounce. It requires planning, a bit of preparation, and a willingness to step outside of your usual grocery store habits. We’ll focus on the macronutrients that deliver the biggest punch, explore the benefits of dehydrated and freeze-dried foods, and build a snacking strategy that keeps you fueled on the trail.
Prioritize fats for weight efficiency
Fat is the most efficient fuel for a pack. At 9 calories per gram, it offers more than double the energy of carbohydrates or protein. If you want to drop pack weight while keeping your energy up, fat is the primary lever you can pull.
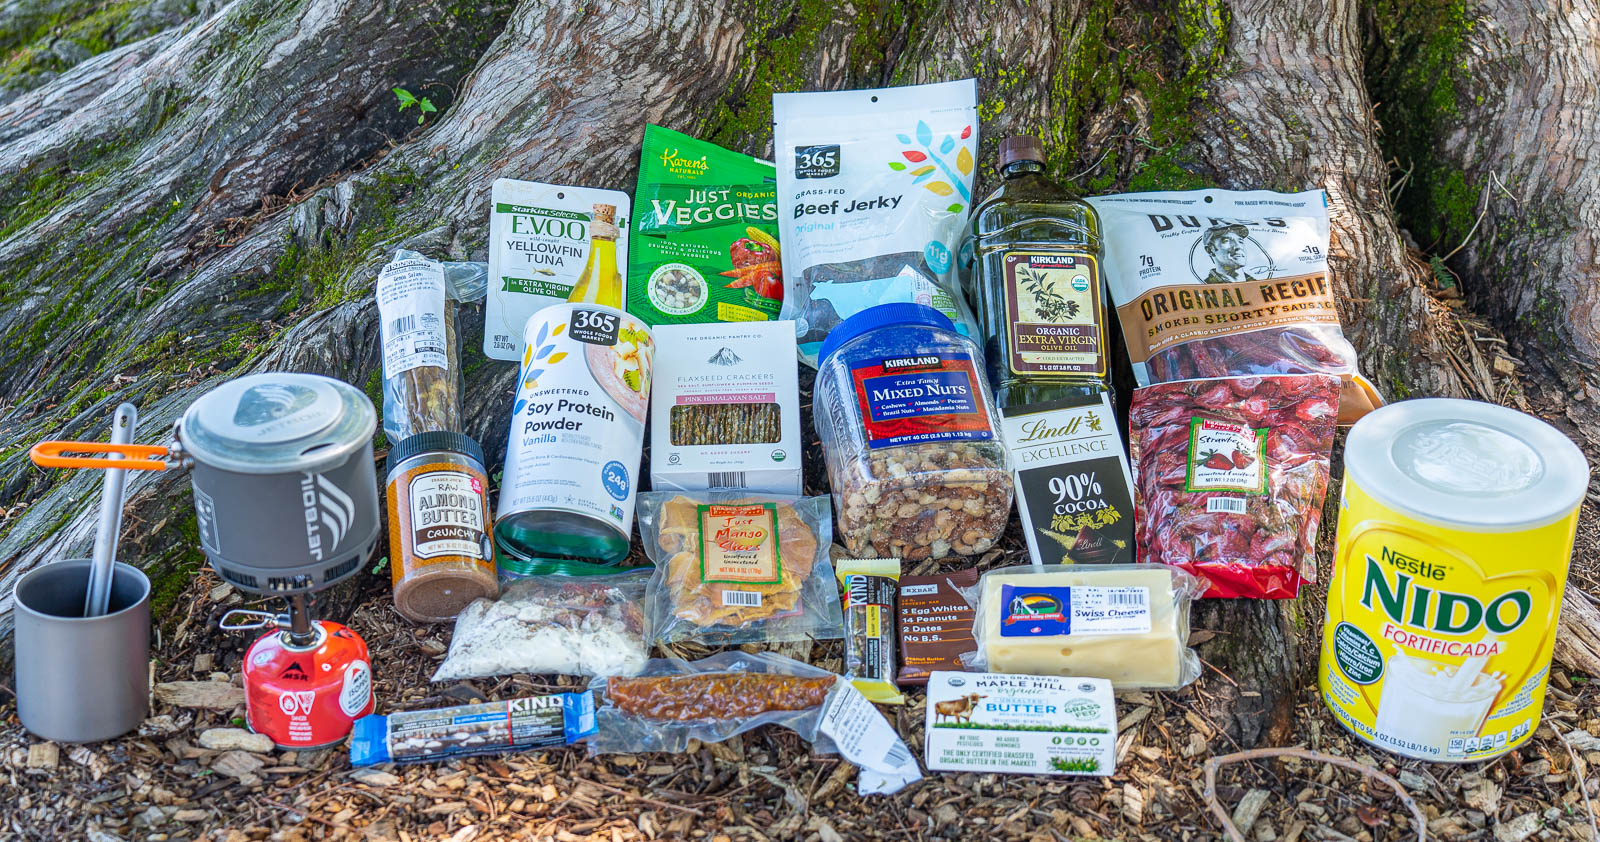
Excellent sources of healthy fats include nuts (almonds, walnuts, cashews), seeds (chia, flax, sunflower), nut butters (peanut, almond, cashew), and olive oil. Adding these to your meals and snacks can significantly increase your calorie intake without adding much weight. I've found that a tablespoon of almond butter with my breakfast can make a huge difference in how I feel on the trail.
Some people worry about digestion issues when consuming a lot of fat while hiking. That’s a valid concern. The key is moderation and frequency. Instead of consuming a large amount of fat all at once, spread it out throughout the day with smaller, more frequent doses. This gives your body time to process it effectively. Experiment with different fats to see what works best for you.
- Nuts like almonds and walnuts for easy grazing
- Seeds: Chia, flax, sunflower
- Nut Butters: Peanut, almond, cashew
- Olive Oil: Add to meals for extra calories
Calorie Density and Cost of Common Backpacking Foods
| Food Item | Calories per Ounce | Approximate Cost per Ounce |
|---|---|---|
| Almonds | 166 | $0.25 - $0.40 |
| Walnuts | 185 | $0.30 - $0.50 |
| Pumpkin Seeds | 156 | $0.20 - $0.35 |
| Beef Jerky | 250 | $0.75 - $1.25 |
| Dried Mango | 130 | $0.50 - $0.80 |
| Granola (average) | 150 | $0.35 - $0.60 |
| Dark Chocolate (70-85%) | 170 | $0.40 - $0.70 |
| Olive Oil | 240 | $0.20 - $0.30 |
Illustrative comparison based on the article research brief. Verify current pricing, limits, and product details in the official docs before relying on it.
Drying food to save your back
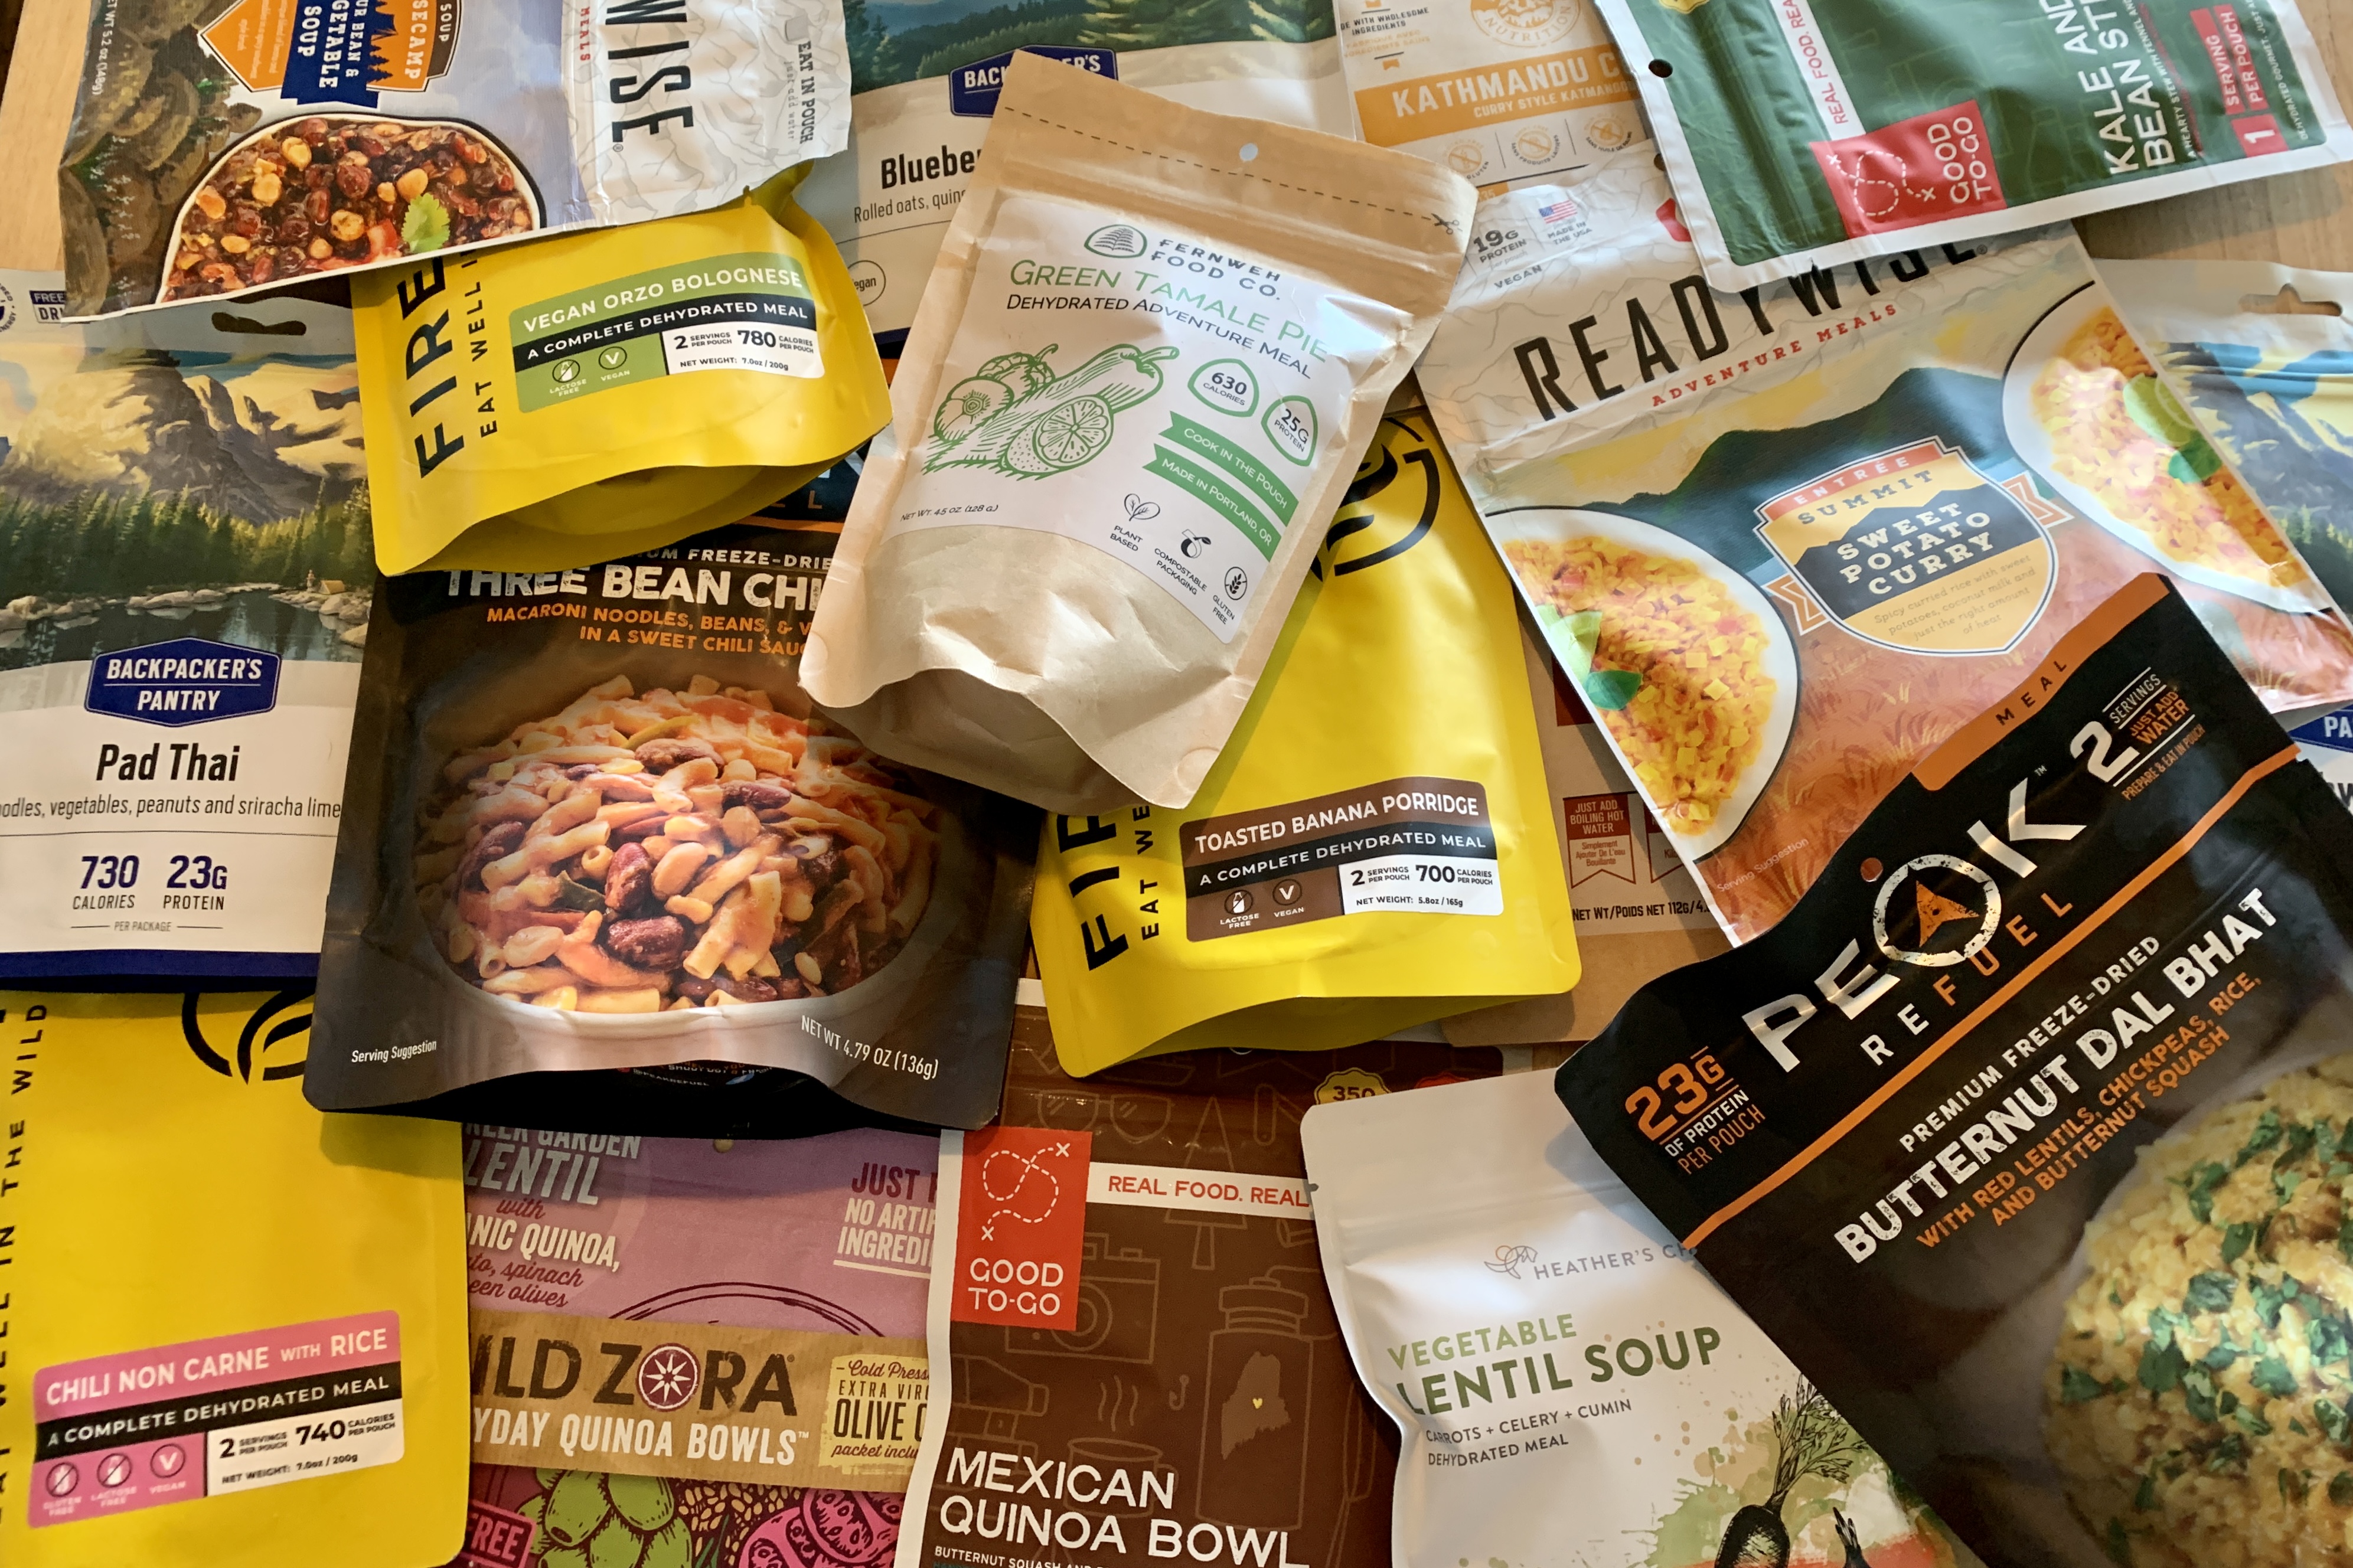
Dehydrated and freeze-dried foods are game-changers for ultralight backpacking. Both processes remove water content, dramatically reducing weight. While often used interchangeably, they aren't the same. Dehydration uses warm air to evaporate moisture, while freeze-drying freezes the food and then uses a vacuum to sublimate the ice – turning it directly into vapor. Freeze-drying generally results in a lighter, better-preserved product, but it's also more expensive.
Commercially available options, like Mountain House and Backpacker’s Pantry, are convenient, but they come with trade-offs. They can be pricey, and some people find the taste and ingredient quality lacking. I personally prefer Backpacker’s Pantry for their wider variety of vegetarian options, but Mountain House has some classics that are hard to beat. Read the labels carefully and choose meals with ingredients you recognize.
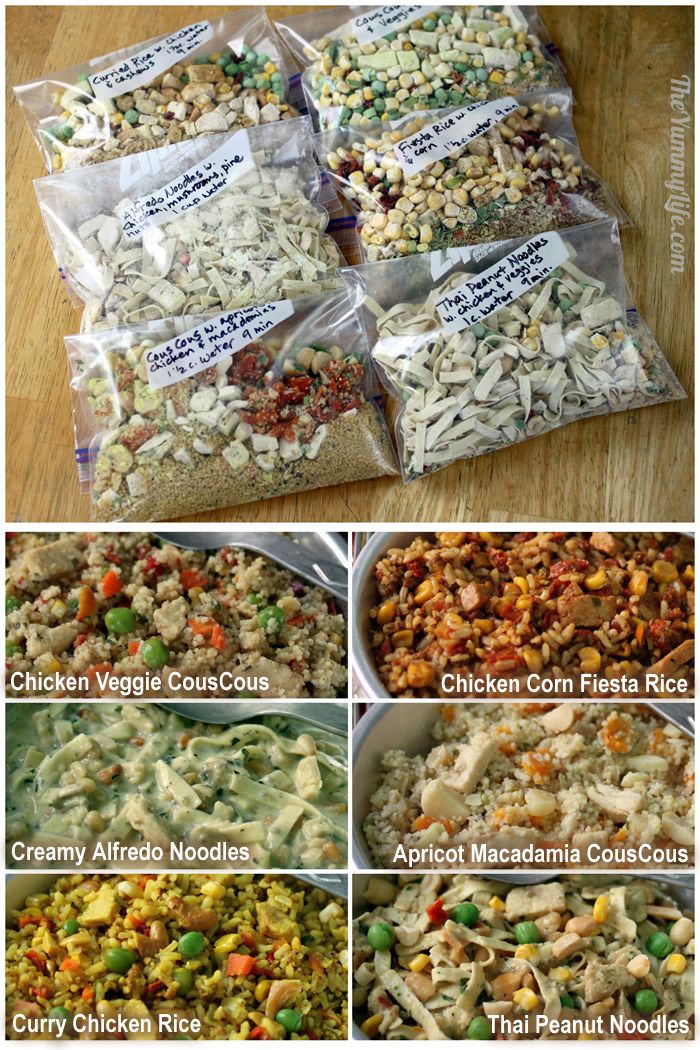
DIY dehydration is a fantastic way to save money and control ingredients. You can dehydrate fruits, vegetables, meats, and even entire meals. A good dehydrator, like an Excalibur 9-tray dehydrator (around $200), is an investment, but it pays for itself over time. Fruits and vegetables need to be sliced thinly and pre-treated (like blanching) for best results. Experiment with different marinades and spices before dehydrating meats for added flavor.
One of my favorite DIY recipes is dehydrated chili. I cook a big batch, season it well, and then spread it thinly on dehydrator trays. It rehydrates beautifully on the trail and provides a hearty, satisfying meal. Remember to package dehydrated foods in airtight containers or vacuum-seal bags to prevent moisture absorption.
Beyond Bars: Snack Strategies
Energy bars are a staple for a reason, but they shouldn’t be your only snack. Variety is key, both for nutritional balance and to prevent flavor fatigue. Think beyond the bar and focus on calorie-dense options that pack a punch. Trail mix is a classic, but pay attention to the ratio of nuts and seeds to dried fruit and chocolate. Prioritize the nuts and seeds.
Dried fruit, like mango and apricots, offers a good source of quick energy and essential vitamins. Dark chocolate (70% cacao or higher) provides antioxidants and a satisfying treat. Jerky (beef, turkey, or salmon) is a great source of protein. Hard cheeses, like cheddar or parmesan, travel relatively well and offer a good dose of fat and protein.
Pre-packaging snacks into individual daily bags prevents you from eating tomorrow's lunch today. I've run out of food hours before camp because I didn't section my rations—now I always pack a 500-calorie emergency buffer.
- Trail Mix: Prioritize nuts and seeds
- Dried Fruit: Mango, apricots
- Dark Chocolate: 70% cacao or higher
- Jerky: Beef, turkey, salmon
- Hard cheeses like sharp cheddar or parmesan that won't sweat out in heat
Breakfast Power-Ups
Breakfast sets the tone for the day, and it needs to be substantial. Oatmeal is a fantastic base – it’s lightweight, affordable, and provides sustained energy. Boost the calorie content by adding nuts, seeds, and a scoop of protein powder. Granola can be a good option, but be mindful of the sugar content; some granolas are essentially dessert.
Breakfast bars are convenient, but again, check the ingredients list. Look for bars with a good balance of protein, fat, and carbohydrates. Instant coffee or tea provides a much-needed caffeine boost to get you going. Consider adding a tablespoon of coconut oil or nut butter to your oatmeal for an extra calorie kick.
My go-to breakfast is a packet of instant oatmeal with a handful of almonds, a tablespoon of peanut butter, and a scoop of whey protein powder. It’s quick, easy, and provides over 600 calories.
Dinner Done Right: One-Pot Wonders
Dinner is your opportunity to replenish your energy stores after a long day of hiking. One-pot meals minimize cleanup and reduce the number of dishes you need to carry. Dehydrated meal kits are convenient, but they can be expensive and often contain unnecessary additives. They are a good option for occasional use, but I prefer to make my own.
Simple DIY recipes are easy to prepare and customize. Instant rice or pasta, combined with dehydrated vegetables and a protein source like tuna, beans, or lentils, makes a satisfying meal. Be sure to rehydrate the ingredients properly – adding a little extra water is always better than not enough.
Here’s a recipe for a lentil and vegetable stew: Combine 1 cup of instant lentils, 1/2 cup of dehydrated vegetables (carrots, peas, onions), and 1 tablespoon of bouillon powder in a pot. Add 2 cups of boiling water, stir, and let sit for 10-15 minutes. Season with salt, pepper, and your favorite spices.
Managing salt and water
Electrolytes are essential for maintaining proper hydration, especially during strenuous activity. When you sweat, you lose electrolytes like sodium, potassium, and magnesium. These minerals are crucial for muscle function, nerve transmission, and fluid balance. Electrolyte tablets or powders, like Nuun or Liquid I.V., are a convenient way to replenish these lost nutrients.
Drink plenty of water throughout the day, even if you don’t feel thirsty. Dehydration can lead to fatigue, headaches, and decreased performance. A good rule of thumb is to drink at least 2-3 liters of water per day, depending on the intensity of your hike and the weather conditions. Water purification methods, such as filters or tablets, are essential for ensuring the safety of your water supply.
I once learned the hard way about the consequences of dehydration. On a hot summer hike, I underestimated my water needs and ended up severely dehydrated. It was a miserable experience, and it taught me the importance of staying properly hydrated. Don't make the same mistake.


No comments yet. Be the first to share your thoughts!