
Beyond Beans and Rice: The 2026 Lightweight Food Scene
For decades, the image of camping food involved heavy cans of beans and bags of rice. Thankfully, that’s rapidly changing. We’re seeing a revolution in lightweight camping food driven by a demand for convenience, better nutrition, and – surprisingly – actual flavor. This isn't just about shaving ounces off your pack weight; it's about enjoying your time in the backcountry without sacrificing a good meal.
The rise of dehydrated and freeze-dried meals is at the heart of this shift. These options offer a fantastic balance between weight, shelf life, and ease of preparation. 'Lightweight' is, of course, relative. A weekend trip allows for a little more indulgence, while a thru-hike demands ruthless efficiency. What works for one person won’t necessarily work for another, so finding the right system is key.
In 2026, the market is flooded with choices, ranging from budget-friendly options to gourmet meals crafted by chefs. The old days of bland, unappetizing camping food are, thankfully, largely behind us. This article will guide you through the best dehydrated and freeze-dried meals available, plus give you the knowledge to make informed decisions about what’s right for your next adventure.
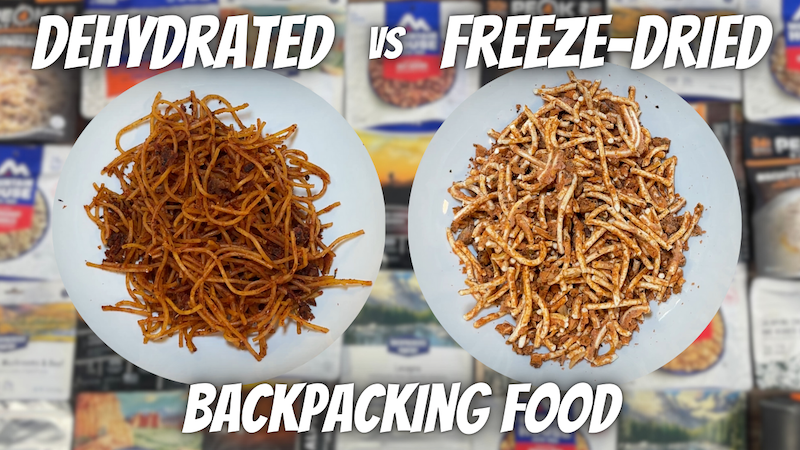
Dehydration vs. Freeze-Drying: What’s the Difference?
Both dehydration and freeze-drying remove water from food to preserve it, but they do so in very different ways. Dehydration uses warm air to evaporate moisture, a method humans have used for centuries. Freeze-drying, on the other hand, involves freezing the food and then reducing the surrounding pressure to allow the frozen water to sublimate directly from solid to gas.
This difference in process has significant implications. Freeze-drying generally results in a lighter product because more water is removed. It also tends to preserve more of the food’s original nutrients, flavor, and texture. Dehydrated foods can sometimes become tough or leathery, while freeze-dried foods retain a more porous, airy structure. Rehydration times can also vary, with freeze-dried meals often rehydrating more quickly.
However, freeze-drying is typically more expensive due to the complex equipment and energy required. Dehydration is a simpler, more accessible process. For fruits and vegetables, the differences are often subtle. For proteins, freeze-drying often maintains a better texture after rehydration. Ultimately, the best method depends on your priorities – weight, cost, nutrition, and desired texture all play a role.
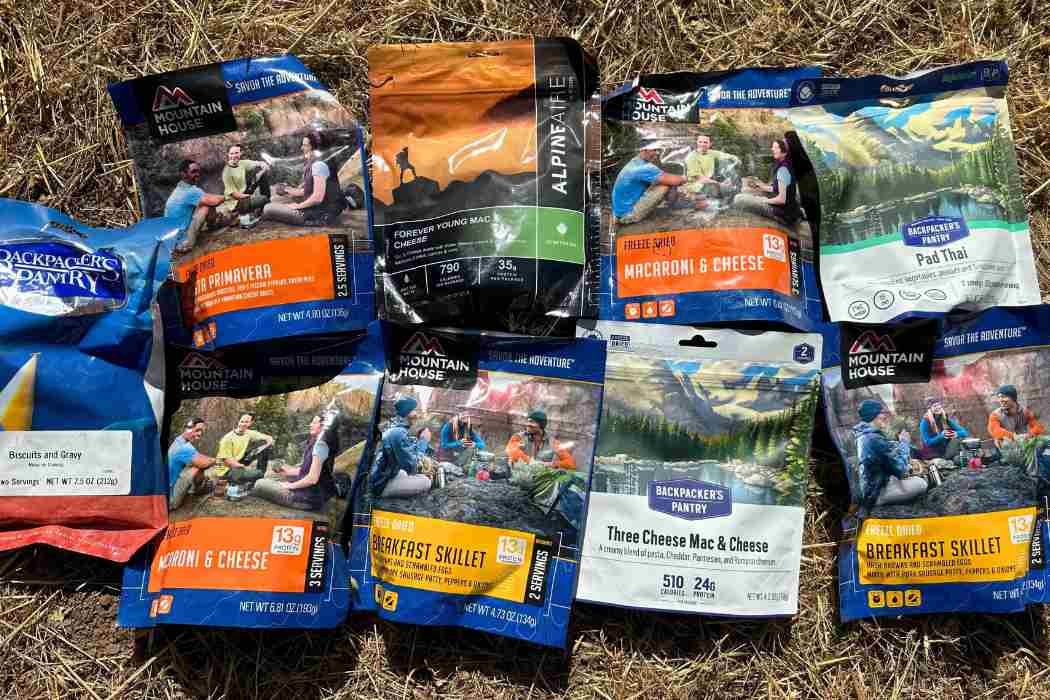
Top 8 Lightweight Meal Brands for 2026
The market for lightweight camping meals is competitive, and several brands consistently stand out. Based on testing methodologies like those used by Serious Eats and a review of user feedback, here’s a look at eight of the best options available in 2026. Prices are approximate and can vary based on retailer and sales.
Mountain House is a classic for a reason. They offer a wide variety of meals, known for their reliability and palatable flavors. Standout meals include the Chicken Teriyaki with Rice ($8-12) and the Beef Stroganoff ($9-13). They're a solid choice for beginners.
Good To-Go focuses on real food ingredients and delicious flavors. Their meals are a little more expensive, but the quality shines through. The Thai Green Curry ($14-18) is a perennial favorite, as is the Smoked Gouda Mac & Cheese ($12-16).
Backpacker’s Pantry is another established brand with a loyal following. They’re known for their diverse menu and commitment to sustainability. Try the Pad Thai ($9-13) or the Shepherd’s Pie ($10-14).
Peak Refuel caters to the high-calorie needs of active adventurers. Their meals are packed with protein and designed to provide sustained energy. The Mountain Beef Stew ($12-16) and the Chicken Fajita ($13-17) are popular choices.
Nomad Nutrition specializes in gluten-free and paleo-friendly options. They use high-quality ingredients and focus on creating flavorful, nutritious meals. The Moroccan Lamb Tagine ($15-19) is particularly well-regarded.
Mary Jane’s Farm offers a range of organic and vegetarian/vegan options. They prioritize whole foods and simple ingredients. Their meals are a good choice for those with dietary restrictions. The Mushroom Risotto ($10-14) is a standout.
Outdoor Herbivore is entirely vegan, providing plant-based options for ethical and health-conscious campers. Their meals are surprisingly flavorful and satisfying. The Black Bean Quinoa Bowl ($12-16) is a customer favorite.
Lightweight Camping Food Revolution: Brand Comparison - 2026
| Brand | Price Point | Taste & Texture | Weight | Dietary Focus |
|---|---|---|---|---|
| Mountain House | Higher | Generally Good, some options Excellent | Average | Wide Variety, including Gluten-Free |
| Backpacker's Pantry | Moderate | Excellent flavor profiles, varied textures | Lighter | Strong Vegan & Gluten-Free selections |
| Good To-Go | Higher | Excellent, restaurant-quality taste | Average | Gluten-Free focused, several Vegetarian options |
| Peak Refuel | Moderate | Good, hearty portions | Average | Paleo & Gluten-Free options available |
| Astral Foods | Higher | Good, focus on international flavors | Lightest | Vegan & Gluten-Free options |
| Wise Company | Lower | Fair to Good, simpler flavors | Average | Long Shelf Life, caters to basic needs |
| Outdoor Herbivore | Moderate | Good, emphasis on plant-based flavors | Lighter | 100% Vegan |
| Nomadix Foods | Higher | Excellent, gourmet inspired | Lighter | Gluten-Free & Dairy-Free |
Qualitative comparison based on the article research brief. Confirm current product details in the official docs before making implementation choices.
DIY Dehydration: Saving Money and Customizing Meals
While pre-packaged meals are convenient, making your own dehydrated food can save money and give you complete control over ingredients. This is especially appealing for those with allergies, dietary restrictions, or a desire to minimize processed foods.
The process is relatively simple: prepare your food as you normally would (cook meats, chop vegetables), spread it in a single layer on dehydrator trays, and dehydrate at the appropriate temperature (usually between 135°F and 160°F) for several hours. Fruits, vegetables, cooked meats, and even entire meals can be dehydrated. Proper storage in airtight containers is essential for maintaining freshness.
A decent dehydrator will cost between $100 and $300. The initial investment is significant, but the long-term savings can be substantial. It does require a time commitment, both for preparation and dehydration. However, the ability to create customized, healthy meals tailored to your preferences makes it a worthwhile endeavor for many backpackers.
- Choose foods that dehydrate well: fruits, vegetables, lean meats, beans.
- Pre-cook meats and grains to reduce rehydration time.
- Slice food into thin, uniform pieces for even drying.
- Store dehydrated food in airtight, moisture-proof containers.
Fueling the Hike: Snacks and Breakfast Boosts
Beyond full meals, having readily available snacks and a quick breakfast option is crucial for sustained energy on the trail. Energy bars and gels are convenient, but can be high in sugar. Look for options with a good balance of carbohydrates, protein, and healthy fats.
Nuts, seeds, and dried fruit provide a calorie-dense source of energy and essential nutrients. Dr. Kracker’s Seedlander Crackers, as highlighted on theyummylife.com, are a great option for a savory snack that won’t crumble in your pack. Oatmeal is a lightweight and nutritious breakfast choice – just add hot water.
Don’t underestimate the importance of electrolytes, especially on hot days or during strenuous activity. Electrolyte tablets or powders can help replenish lost fluids and minerals. And of course, a steaming cup of instant coffee can be a morale booster when you need it most.
Bear-Proofing Your Food: Safety First
Proper food storage is paramount in bear country. Bears have an incredible sense of smell and are attracted to even the faintest scent of food. Failing to store food properly can have serious consequences for both you and the bear.
The most reliable method is using a bear canister – a hard-sided container designed to prevent bears from accessing your food. Bear bags, when hung properly using the PCT method or similar techniques, can also be effective, but require skill and suitable trees. Regulations vary significantly by location, so always check with the local park or forest service for specific requirements.
Never store food in your tent. Always cook and eat at least 200 feet away from your campsite. Pack out all trash and food scraps. Remember, you are a visitor in the bear’s habitat, and it’s your responsibility to minimize the risk of encounters. For more information, consult the National Park Service website.
- Use a bear canister whenever possible.
- If using a bear bag, hang it properly and securely.
- Store all food, trash, and scented items.
- Cook and eat at least 200 feet from your campsite.
Standout Meals: Worth a Closer Look
After testing many options, a few meals really stood out for their flavor, convenience, and nutritional value. The Good To-Go Thai Green Curry is exceptional. It’s surprisingly authentic-tasting, with a creamy coconut milk base and a pleasant level of spice. It contains 400 calories and 20g of protein.
The Peak Refuel Mountain Beef Stew is a hearty and satisfying option for cold evenings. It’s packed with protein (35g) and calories (600), making it ideal for demanding activities. It's not the most refined flavor, but it's incredibly filling.
Finally, Nomad Nutrition’s Moroccan Lamb Tagine is a delightful surprise. The complex blend of spices and tender lamb create a truly memorable meal. It offers a good balance of protein (25g) and carbohydrates, with 450 calories. It's a bit pricier, but the quality justifies the cost.
Future Trends: What’s Next for Lightweight Food?
The lightweight camping food industry is constantly evolving. We’re likely to see continued innovation in packaging, with a focus on reducing weight and environmental impact. Sustainable packaging options, like compostable pouches, are becoming increasingly common.
Ingredient sourcing is another area of focus. The demand for organic, locally sourced ingredients is growing, and companies are responding by prioritizing transparency and ethical practices. Plant-based meals are also gaining popularity, driven by both environmental concerns and health trends.
Looking further ahead, personalized meal plans based on individual dietary needs and activity levels could become a reality. Imagine a system that analyzes your hiking itinerary and creates a customized menu designed to optimize your performance and recovery. The future of lightweight camping food is looking delicious.
No comments yet. Be the first to share your thoughts!